Drip Campaigns are a powerful, automated way to automate communications, workflow and tasks - and keep in touch with leads.
For any lead to receive the Drip Campaign, the campaign must first be selected and attached to the lead.
A single Drip Campaign can be used with any number of leads (and a lead can have multiple campaigns attached).
If you haven't yet reviewed your Campaigns, find out how to: Create and Edit Drip Campaigns.
As soon as a Campaign is assigned to a lead it will start to execute.
if you are in a team then your Drip Campaign activities can be assigned / sent-from different team members that have different Roles with the Lead.

There are several different ways to assign a campaign to a Lead that are explained below.
- As the 'default' campaign when a lead registers on your website.
- Or, manually assigning (or re-assigning) a campaign on the Lead Detail panel.
- Lead Capture forms used on your 'squeeze pages' can specify a Campaign to be assigned (as part of the widget filter).
- Or, when bulk importing leads, (e.g. CSV import) a Campaign can be specified for leads at this time.
- From the Lead Summary tab - select multiple leads and use the bulk action method to Attach Campaign. Remember that a drip campaign can be just a single email - this can be useful when you want to send something out to a multiple leads using this method.
1. Set Your Default Campaign
A default campaign can be specified as part of your personal preferences.
See Default Campaign Settings for more details.
2. Manually Assign a Campaign to a Lead
The campaign assigned to a lead can be changed at any time using the Campaign option on the Lead Detail page.
Click the "Campaigns" tab, then click the "Attach Campaign" button.
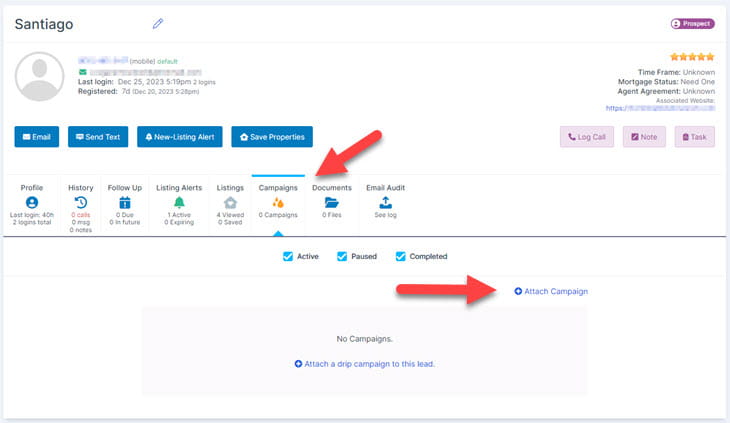
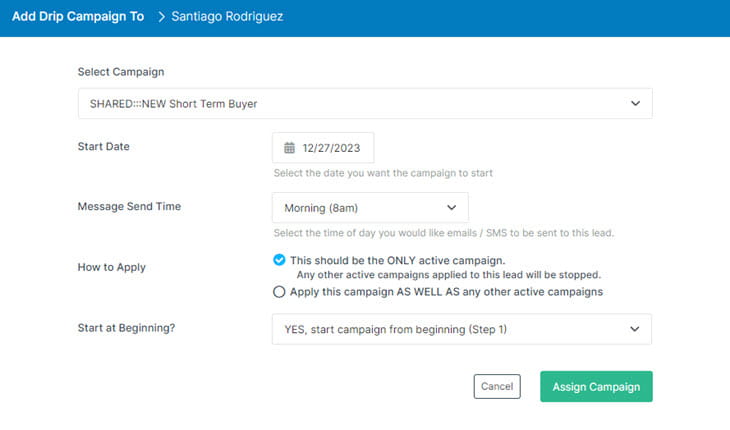
The Campaign options panel appears (pictured below).
Now choose:
- which campaign
- when to start the campaign, this can be in the future
- what time of day to send emails (if the campaign is automatically attached then this is always set to early morning)
- to replace other campaigns or add this campaign as well as others
- to start the campaign from the beginning or at some other step
You may choose to attach multiple campaigns to the same lead.
Click Attach Campaign button.
3. Specify Campaign with Lead Capture Form
When using Lead Capture forms (either standard Widgets or your own custom forms) an option filter parameter can be used to specify the Campaign and leads are to be assigned to.
The filter format is:
filter="campaign:campaignID"

For Example:

filter="campaign:12345"
For more details, see Lead Capture Form Widget Reference
4. Specify Campaign with Bulk Lead Import
When importing leads via a CSV form submission, a Campaign may be specified for each of the leads.
For more details see Import Leads CSV.
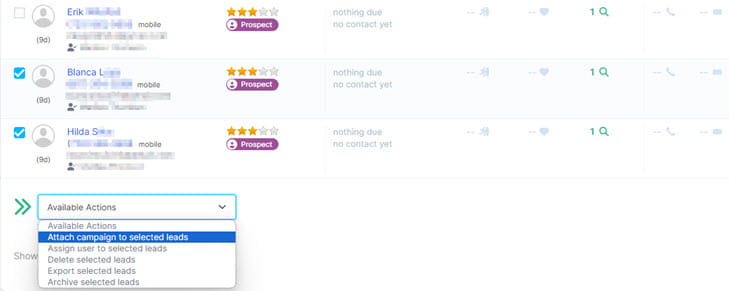
5. Attach to Multiple from the Lead Summary Tab
On the Lead Summary page - use the checkbox on the left to select one or more leads and then at the bottom of the table, choose the action to "Attach Campaign to Selected Leads".