This article explains how to parse an email and then create a structured email to send data to your Buying Buddy account using the EMail Import API method.
NOTE: The recommended approach for using Zapier is to use the Buying Buddy Zapier App - see the main article on Using Zapier for an overview of the Buying Buddy Zapier App, which provides a much more convenient and possibly simpler way to connect Buying Buddy to other applications
This article first looks at how to create the first "Trigger" part your ZAP by receiving an email using Zapier's Email Parser.
We will then describe how to create a Zapier Action to send a structured email to your Buying Buddy account to import lead data.
Zapier's email parser is a separate system requiring a separate login using your same Zapier credentials.
Suitable For
- Where any third party is sending you leads in a consistently structured email.
- Examples: Email leads from Realtor.com, Housevalues etc
Preparation
- Lead data will be imported using the "Lead Import via Email API" method. You should review the support article to understand the method, and see which fields can be mapped directly to Buying Buddy CRM fields.
If a field does not specifically exist in the Buying Buddy CRM then you can import data to the notes field. - Carefully review the emails you are receiving from your lead source. Identify the fields that will be used to import the lead
See Lead import Via Email API and Lead Import API Reference
Summary of Method
- Create a Email parser mailbox to receive leads from the 3rd party
- Create ZAP that uses the emails received as a Trigger
- Create and Action that copies data received to an email and send to your Buying Buddy Account.
Create a Zapier Email Parser Mailbox
Emails that you receive will need to be parsed to extract the data.
Zapier will connect to several parsers. In this example we will look at using the Zapier EMail Parser.
STEP-1:
Log in the Zapier Email Parser using your existing Zapier account credentials at https://parser.zapier.com/
Create a new Mailbox that you are going to use to receive your emails.
NOTE: You will need a different mailbox for each lead source.
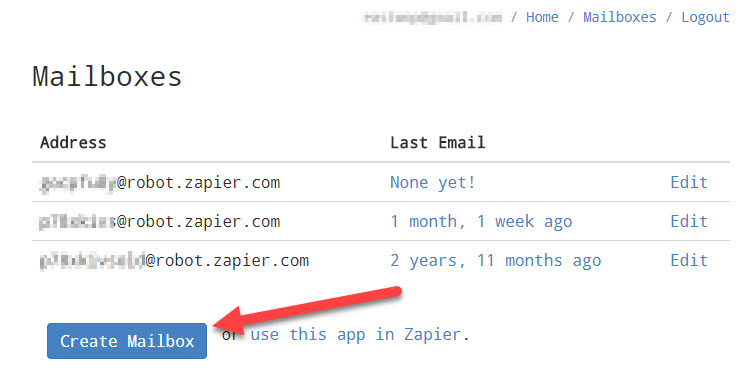
Zapier will create your mailbox and show you the email address you should use for this mailbox
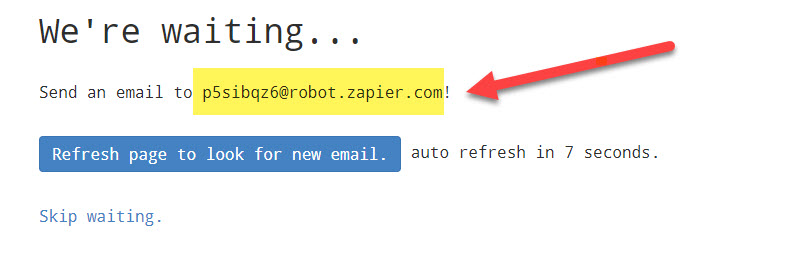
Make a note of the email address - we suggest you copy and paste the address to an electronic document / notepad, rather than write it out so that its accurate!
STEP-2:
Now you will need to go and update the settings of your lead generation service so that it sends email to this NEW email address.
Send a test email so you have something to work with to create the email parser.
STEP-3:
The next step is to create a parsing template that instructs Zapier how to read the emails and extract the data from them.
See Zapiers instructions on how to do this within your Zapier Email Parsing account: https://zapier.com/help/email-parser/
At the end of this process, you should have a template set up for your new mailbox.
The next step is to go to your Zapier account, and create a ZAP to get the data, and forward it on to your Leads and Contacts account.
Create a Zap to Use the Mailbox
Login to your Zapier account.
There are 2 parts to a ZAP: Trigger + Action
The rest of this article looks at how to create the Trigger. The next article explains how to create an Action to send email data to your Buying Buddy Account.
To get started, click "Make a Zap".
STEP-1: Trigger
- The first step is to choose a Trigger App. You should see "Email Parser" shown, but if not then use the search option to find it and select it.

- The next panel shows the available Triggers for this App - and you need to select "New Email" and click "Save + Continue"
- Select Email Parser Account
On this next panel you should see that you are connected to your Email Parser account. You can click to test that it's all connected up correctly.
Click "Save + Continue" - Select Mailbox:
On the next panel you need to choose the mailbox you created - so look for the email address you made a note of and select that. - The final step in this Trigger section is to test.
STEP-2: Action
The final part of your Zap is to create the Action that sends a structured email to Buying Buddy for import using the Email Import API.
This method does NOT use the Buying Buddy Zapier app.
Preparation and Planning
The Email Import method is explained in Lead import Via Email API.
The Email Import has many options that you may want to consider as part of creating your Zap. Options are all explained in the Lead Import API Reference.
- Do you want to send a welcome email or other email or attach to a drip campaign?
- Are leads to assigned to a single user - or assigned via the round robin?
- Do you want to also assign leads to additional users such as assistant or loan officer in your account?
- Do you wish to assign tags, category or a star rating?
- Do you want to create a Task, and add in notes?
Create Zap Action
The Action step will be setup to take the data collected from your Trigger, and assemble into a new email and send to your Buying Buddy account
This is how your Zapier page will look when you are editing your Zap:

- Choose the Zapier Email App as the Action App
- On the next panel, there is one option - "Send Outbound Email" - so click "Save + Continue"
- In the next step you will "Set Up Template", as shown below:

- To: This will always be: leadimport@leadsandcontacts.com
- Subject: This can be anything as it is not used
- Body: This needs to be the set of special options for the lead import API. You can get the template here.
- The next step in the Template panel is to INSERT FIELDS to the Body for each of the parameters.
IMPORTANT: Your personal Lead Import ID must be written in - this can be obtained from your Buying Buddy Account, as follows:- Go to Leads > Import From Zapier . Your Lead Import ID is shown. Click "Insert Field" as shown in the above image to see the available fields. The list of available fields (that come from the parsed email) will be shown BELOW the Body field (so scroll down to see it)
- Place the cursor to the right of the field name and then select the field to insert.
Repeat for all the data fields you want to add. - Other fields such as FROM etc. can be set to values such as your own name and email - these are not used by the API Importer in the Buying Buddy CRM.
Once you have completed these final steps, make sure your ZAP is ON and then test!